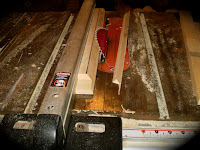
Cut the board to top bar length, center on the hive and mark the inside hive walls onto the board.


1) Raise the blade of the table saw to the mark.
2) Establish the depth of the bar overhang. I find ½ inch is sufficient. Mark one side of the board top and make sure that side rides against the fence when cutting th 1/2" into both ends.

Tilt the saw blade. Full 45º is not necessary, but tilt it more than the walls of your hive. OK to approximate. Lower the saw blade to the height of the groove you just cut.


Align the board (by eye) so that the top of the blade meets the overhang cuts. Bring the fence to the end of the board.
Cut both ends. This will be the overhang resting on the walls of your hive.


Cut the board into bars. 1 1/2" for honey 1 1/4" for brood or 1 3/8" if using only one size bars. If you haven't been using your "finger saver" up to this point you should definitely use it from here onward. Notice the black mid-line drawn on one of the bars. Will use that next.
 Tilt the saw blade to 45º and raise it to reach the top of your bar. Align the black midline with the top of the saw so that the saw will cut to the line but not past it. If you cut too little and then adjust and cut again it's OK. Bring the guiding fence to the bar.
After the first pass.
 After the second pass.Save those triangular scrap piecess. After you clean the ends you have perfectly good chamfor moldings. You can glue and nail them as guides on your old (or future) rectangular bars.
Finished bars and a bundle of chamfor moldings.


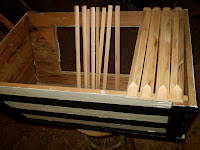
Bars on top of the hive and inside view

The "girls" will love them.
Good luck!
Notes: I work with raw lumber, a bit over 1” thick but 2X6 (or 2X8, 2X10 etc.) from the lumber yard should also work. ¾" (called 1X...) lumber is a bit too thin to get a guide edge and keep the desired width of the bar.
If any of the pictures are unclear you can click on them and they'll get larger. Much, much larger. :) If they are still unclear: sorry. Leave me a message and I'll try to clarify. Any questions, I'll do my best to answer.Enjoy!